Artisan 700 Problems?
The Epson Artisan 700 wireless set-up can be stressful enough, but what happens when the printer gives a mysterious error and demands a call to support. The Epson Artisan 700 all-in-one inkjet printer is an excellent choice based on numerous reviews around the web, however there are some lesser known problems that may pop up over time – and they have alternative solutions.

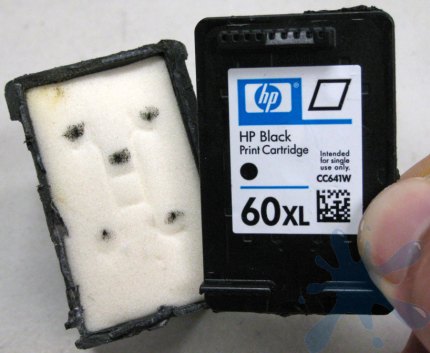
Artisan 700 waste ink pads - removed from brand new printer, after initial ink charging.
A major issue is the waste ink pads – there are super absorbent pads inside the printer that are present to soak up wasted ink, or ink used during cleaning and spillage through normal printing. Once these pads get full of “wasted” ink, the saturation level is communicated to a memory chip inside the printer, and the printer will not function until the waste ink memory is reset, and the pads may need changing. This is all covered under the warranty, however if the printer has been modified for a CI system, or other reason, warranty support may be void.
If the printer is out of warranty, there is hope. That memory chip has to be reset with a piece of software generally reserved for Epson tech support staff. Through the magic of the internet, the Epson made waste ink pad reset software tool from Epson support can be had, for a price.
Removing the waste ink pad – Artisan 700:
Step One:
Get a good work area set-up. You will need a phillips-head screwdriver, and something with a flat surface to pry something open with. A small flat-head screwdriver should do the trick.
[tools]
Step Two:
Position the printer with the LCD screen down, and the scanner lid facing away. Stand it up on the LCD screen side, and have the bottom of the printer facing you. This way, the screw is easier to get to, and the waste ink pads tray can just fold open like a book.

View of bottom of the Artisan 700 inkjet printer. Waste ink pad is highlighted.
Step Three:
Remove a single screw.

Pry off the waste ink pads with a flat-head screwdriver. There is a slot, right next to the screw. You will see it.
Step Four:
The waste ink pad opens up like a book. Watch the silver plate that covers the waste ink pad part. It is quite gangaly, and very hard to get back on once removed, so try not to let it come off the plastic cover – there are opposing hooks and slots, which makes the silver cover hard to get back on the plastic waste ink pads part. It is “loosely” connected to the plastic part, best to not let it come loose.

If you can pry down over this latch next to the screw hole, the waste ink pads come off easily.
Step Five:

Tubing to route the waste ink to the pads.
Locate the tubing – notice how it’s configured. The waste ink tube goes into a dispersion part, and is this distributed throughout the waste ink pads. Artisan 700, 710, 800, 810 inkjet printers used a bunch of ink during the cleaning process.

Good view of how the waste ink is sent to the super absorbent waste ink pads. Click for larger image.

Artisan 700 waste ink pads exposed - open from the bottom of the printer.
If you are simply replacing the waste ink pads, just reverse the above steps and you are done. Watch that silver panel – it likes to fall off, and it is very hard to get back on.
Step Six (optional):
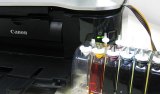
Connect Octoinkjet (Ink-Anarchy in the UK) external waste ink container.
An external waste ink collector can be a very good idea for the Artisan series of inkjet printers, or for any Epson inkjet – when used with a CI system, and high volumes of printing are being done. The Epson cleaning cycle wastes a ton of ink, however levels vary depending on printer model. All that ink has to go somewhere, and when the waste ink pads get “full” the printer will no longer function and the internal memory must be reset (requires Epson service, or 3rd party solution). The waste ink pads error can be tripped by saturated pads, or when the pre-programmed print limit has been reached.
Installation is quite straightforward.

Connecting the waste ink tubing for the Artisan 700 to an external collector. Could be a very good idea with the Artisan series - they use a ton of ink on cleaning.
Plenty of room for the waste ink tube to exit the printer. We could not see an obvious, or easy way to route the tubing through to the outside with the waste ink pads re-installed, so we just left them out.

The octo waste ink collector sits nicely behind the printer:

Step Seven:
If you want to use an external waste ink kit, and, you want to re-install the waste ink pads, you will need to do a little modification. The easiest way involves a drill? However, there is always the warranty issue, and if you want to preserve your warranty by not modifying the case things get a bit more tricky. We are not currently aware of a non-warranty breaking method of doing this. If you know of one, let us know. freetoprint at gmail dot com.
Show me more…
You can get a continuous ink system (CIS, CISS, Bulk Ink) for your Epson Artisan 700, 710, 800, or 810 photo inkjet printers here. If you are looking for an external waste ink container, you could try to make one yourself – but we recommend Octoinkjet based in the UK.
Filed under: CIS, Continuous Ink Systems, Epson, Inkjet Printers | Tagged: 700, Artisan 700, artisan waste ink, CIS, CISS, epson 700, epson artisan 700, epson waste pads, Error, pads, reset, resetter, waste ink, waste ink pads | Comments Off on Answers: Artisan 700 Problems? What is a Waste Ink Pad?


You must be logged in to post a comment.